

V-Fold Pop-Up Tutorial: Bringing Your Drawings to Life
Art deserves to be seen (not just scrolled past at double speed), and how to master this essential pop-up technique.

For years, I’ve been posting reels of my pop-up creations on Instagram. I learned how to navigate the world of vertical video—within those 30 to 90-second clips—and I tried to fit my thoughts into the tiny, restricted caption boxes of social media. I came to understand the pace, the scroll, and the fleeting nature of it all.

But in that process, I also realized that art deserves to be seen, not just scrolled past at double speed. I soon eliminated the “speedup” from my toolkit, yet I still didn’t know what to do with the deeper thoughts and lessons behind each creation—things that are truly a challenge to convey on Instagram. Because, most likely, it simply isn’t meant for that.
But now, I’ve arrived here on Substack. Here, I want to show you in more detail what actually happens on my desk. Paper Poetry gives me the space to truly reveal the details and express thoughts that go deeper than a quick swipe.
Today, we are starting with the absolute basics: the V-fold mechanism, which we will then combine with the other fundamental pop-up structure, the parallel fold.
1. The V-Fold: Creating the background
The V-fold is the “engine” of pop-up art. It is a diagonal mechanism that creates the most dramatic movement.
How it works: We give the entire mechanism motion by opening the page. If it’s glued in the right place, this opening motion gives just enough force to the paper to lift it up.
The Secret to Success:
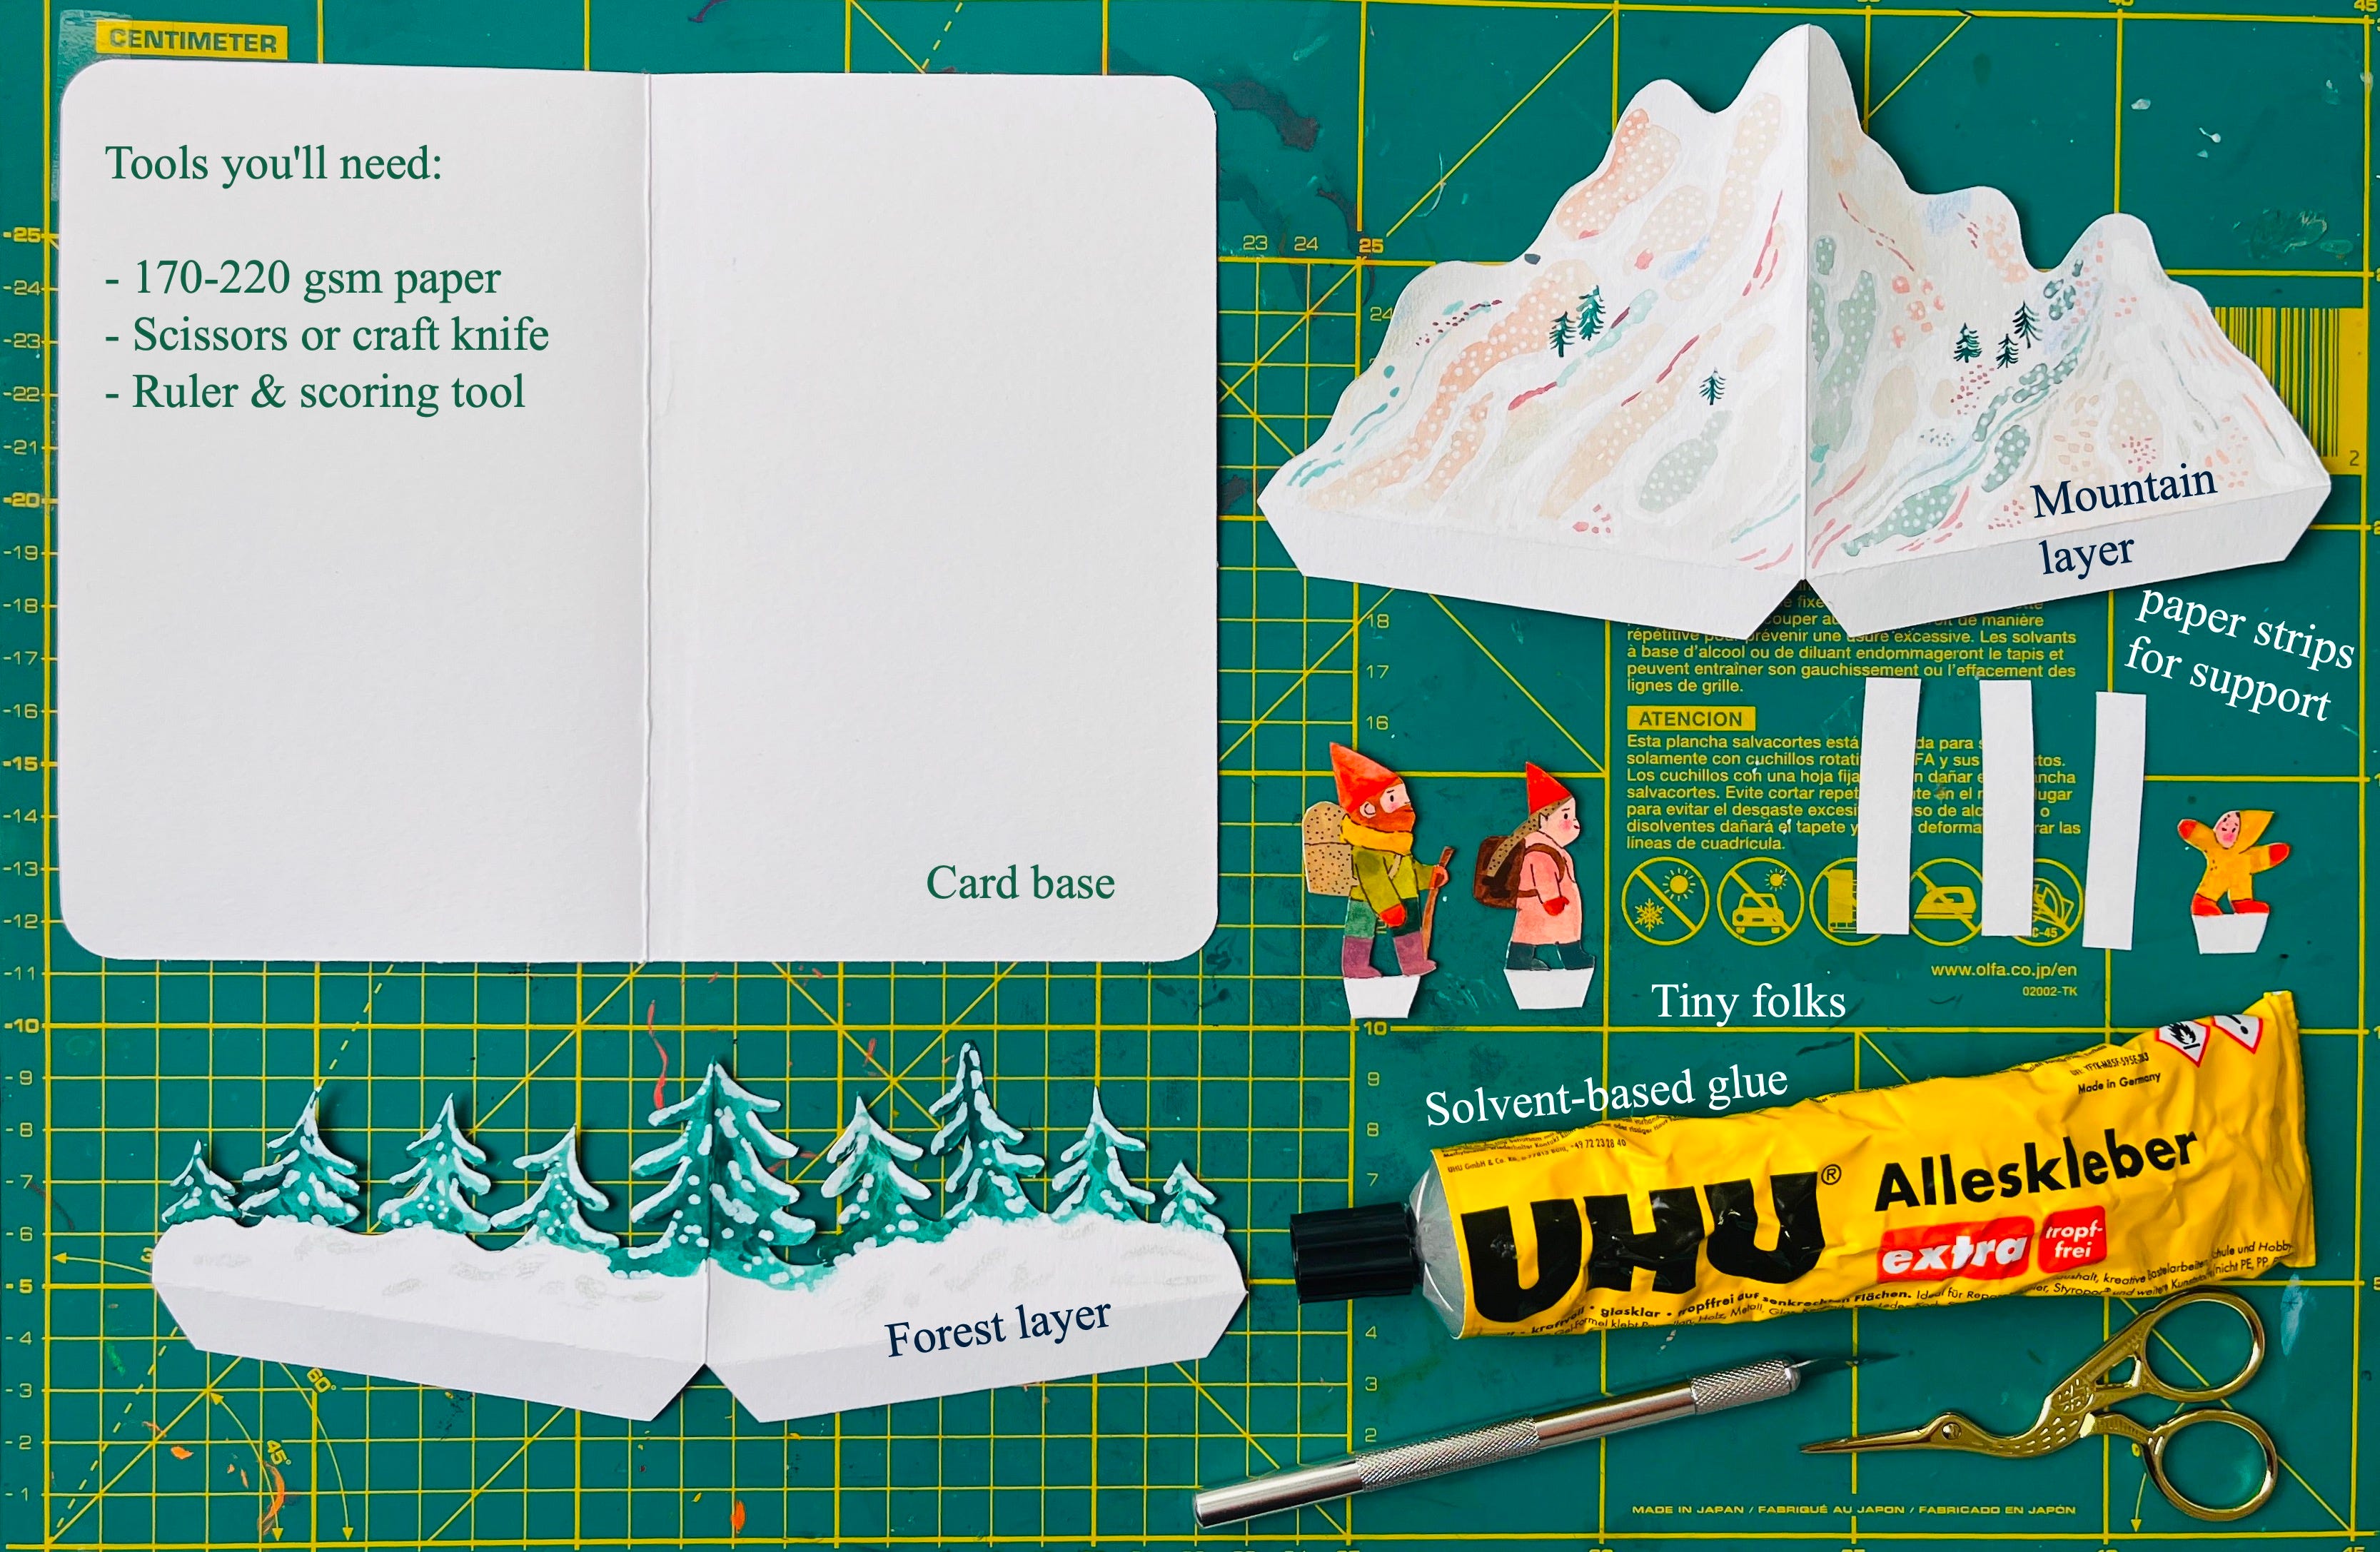
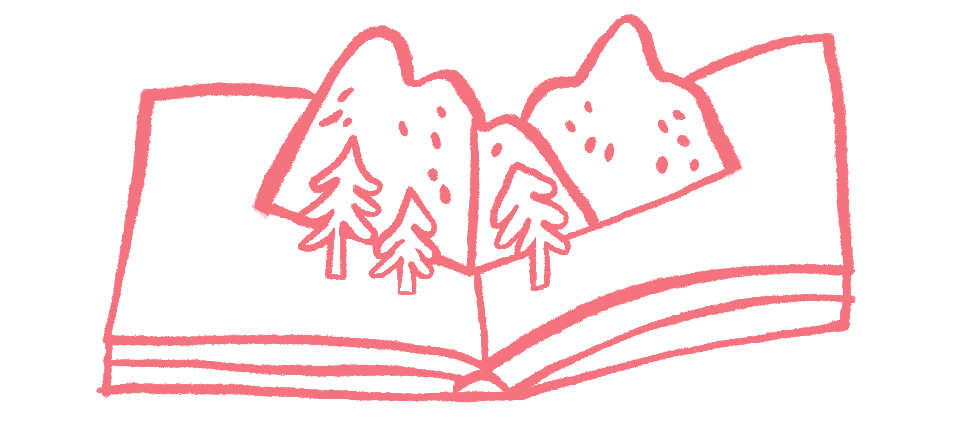
You can glue at many different angles, and I’m intentionally not giving specific angles. Look at the picture of elements and aim for something similar.
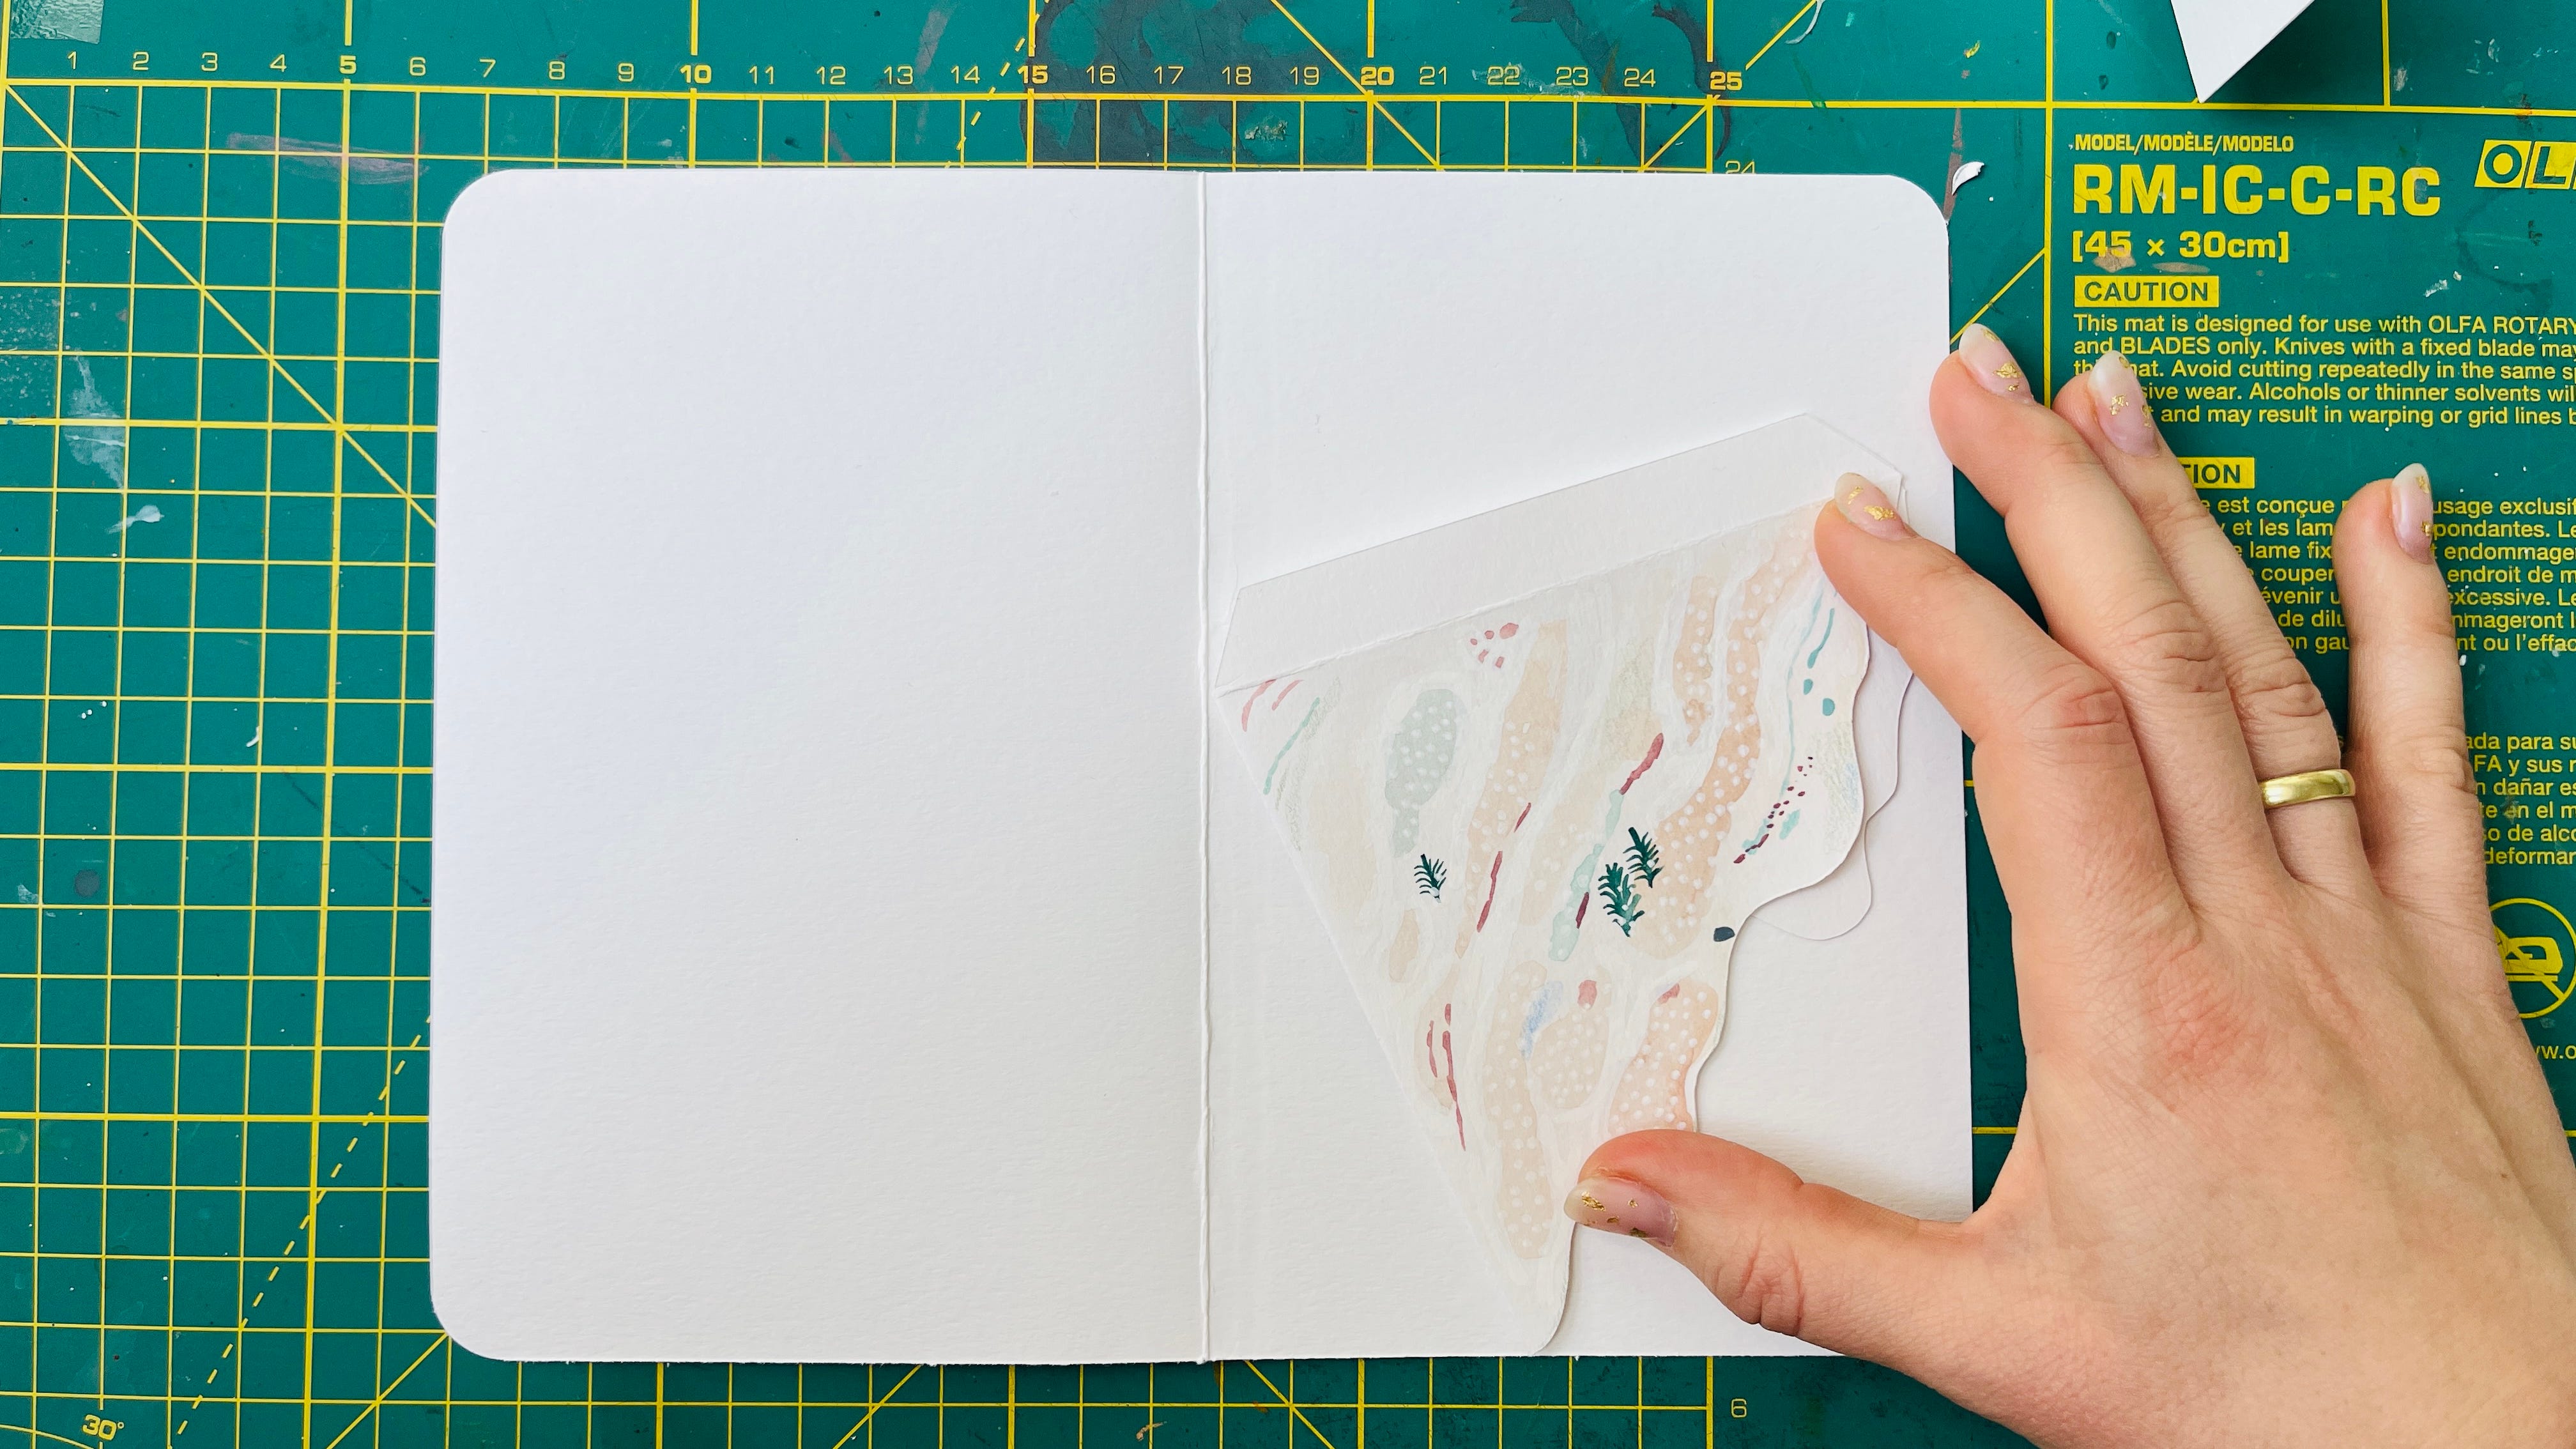
The mountain and the base of the trees to be glued form a gentle V shape, creating an acute angle. When you glue it to the paper, look for an even sharper angle. The point of the V should face downward.

Make sure that when closed, the mountain doesn’t stick out beyond the paper. And the biggest secret is that you first glue one side, then once it’s dried, you close the mountain, glue the tab and close the page. This ensures it will be in exactly the right place, with the two tabs glued in perfect symmetry.
The handmade touch: I like to keep the mountain’s peak slightly asymmetrical in drawing, even if the mechanism itself is perfectly symmetrical.
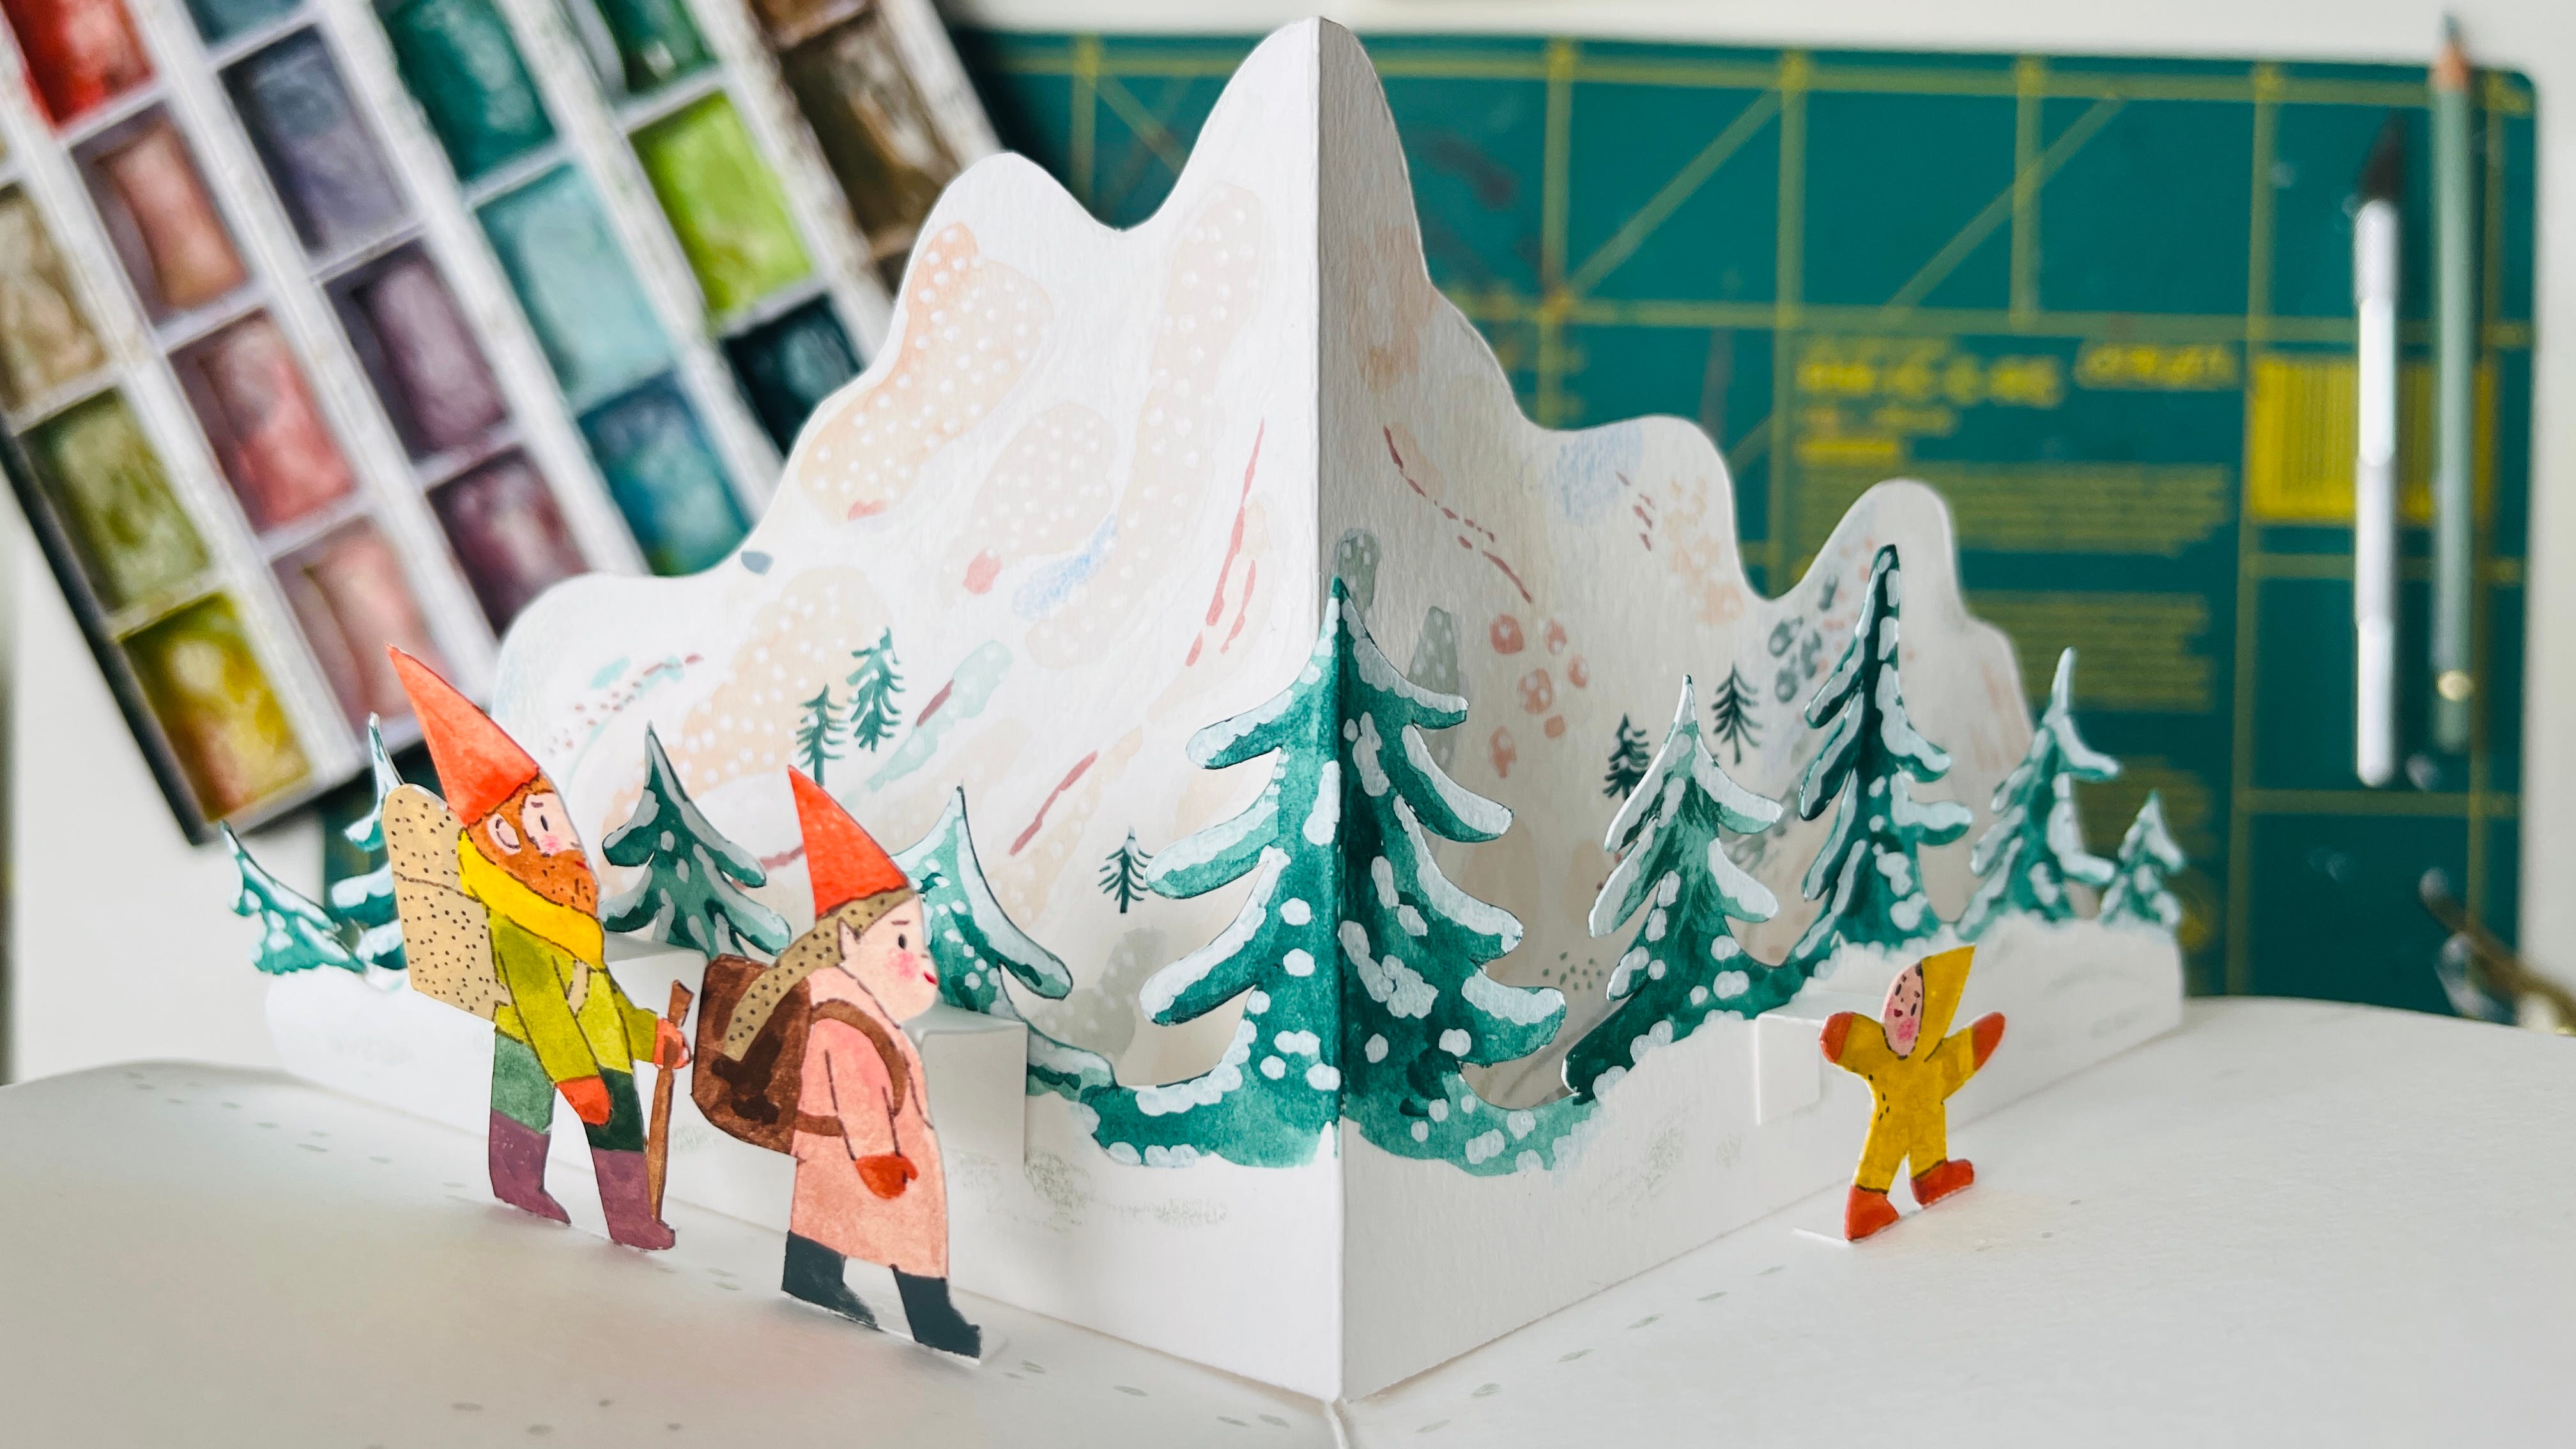
2. The Parallel Fold: Adding the Hikers
While the V-fold creates height and drama, the parallel fold creates a “stage.” I used this to place my hikers in front of the pine trees.
How it works: This mechanism is driven by the V-fold. If it’s in place and the glue has set, the paper is strong enough to hold the additional layers attached to it. To do this, first glue the little hikers to the ground using their own glue tabs. Behind them, glue a U-shaped folded paper strip.
The secret: Wherever you glue down the little hikers, measure and glue the small U-shaped paper strip behind them at a maximum distance equal to that measurement. It can be slightly shorter, but it should never be longer. Again, the order is important: first I glue it to one surface, put a little glue to the other, close it, and then it finds its place on the other surface.
Troubleshooting: What makes it work (and what doesn’t)
Strong base: It often helps if you reinforce the base, for example by gluing two layers of paper together. If the base is weak, the mechanism won’t move as nicely.
The Closing Test: The paper must “breathe.” Before the glue sets, always close the card slowly. If there is resistance, your angles are fighting each other.
Flattening: At the end, it's worth letting the pop-up card or sketchbook rest under a weight for a day.

Your Turn: What will you build?
Now that you know the secret of combining the V-fold and the parallel fold, the possibilities are endless. You don’t have to stick to mountains and hikers—think of this mechanism as a stage for your own imagination.
To get your creative gears turning, here are 4 prompts to try this week:
City Lights: A towering A-frame building or a skyscraper as your V-fold backdrop, with tiny yellow taxis and busy pedestrians on parallel steps in the foreground.
The Great Wave: A massive, sharp-crested wave as your V-fold, with surfers or dolphins ‘jumping’ on the parallel folds in front of it.
Cozy Campsite: A steep A-frame tent as your central V-fold, with a tiny campfire and pine trees stepping out toward you.
Enchanted Greenhouse: A large, angular tropical leaf (like a Monstera) as the V-fold, with smaller potted plants and butterflies on the parallel folds.
My advice: Start with a quick sketch in your sketchbook. Don’t worry about the folds yet—just decide what is ‘far’ and what is ‘near.’ The paper will do the rest of the work for you.

Ready for something more advanced? If you want to dive deeper, visit Tutofabrik on Etsy. You’ll find my more complex pop-up templates there, each paired with a full, detailed video guide to help you master every fold.
I’m curious—which of these 4 prompts sparked your imagination the most? Or do you have a completely different scene in mind that you’d love to bring to life? Let’s brainstorm some ideas together in the comments!
I am so impressed that you are willing to share this! Your art is lovely and I am excited to give this a try! Thank you!
Thank you so much for this tutorial! I took a rudimentary pop-up class in the fall with a friend of mine, where we explored folds - but I've been having a hard time applying it to anything. Your tutorial and prompts are fantastic and I am going to set aside some time this week to try (and also check out your etsy templates).